

"Self Portrait"
December 2014
Acrylic and Oil
Paint on Canvas
12" x 12"
Fellow artists and students often ask me about my artistic process. Just this morning my website received a request from a student asking, "How do you make a perfect artwork?" My work is very smooth, very detailed, and very crisp due to the order in which I do my steps. So rather than continue to answer each inquiry individually, I thought I'd write a nice detailed post that I could refer people back to when they're curious to know what I do. Definitely feel free to share this post with anyone looking to learn how to do realistic portraiture. :)
Step 1: The Drawing

Just the other day I had a friend and fellow artist ask how I get my drawings onto the canvas and I gave him a rather quick answer and was disappointed with the way I explained myself. I use different methods depending on the amount of detail. I always start with a sheet of white paper (for smaller pieces) or a sheet of Kraft paper (for larger pieces). On this paper I will create my to-scale drawing based off of my reference image(s). To make sure my lines are correct I will use a sight stick and/or a ruler to measure everything out. I am not the type of artist that just lets my drawing flow, or at least not very often. If the reference image is complicated I may use the grid system over certain areas for example in the jewels you see above. The drawing is done on a separate piece of paper, rather than drawing it directly on the canvas, because your final surface should be free of any unnecessary impressions. A pencil mark on a canvas, even if done very lightly, is likely to appear under the paint as a little ridge. Once I am pleased with the drawing and can only imagine minor changes it is transferred over to the canvas (or painting surface) using the carbon method. Whatever drawing is copied onto the canvas can now be altered ever so slightly but the lines will be imprinted so make sure you are very pleased with your drawing before doing the transfer.
Step 2: Background
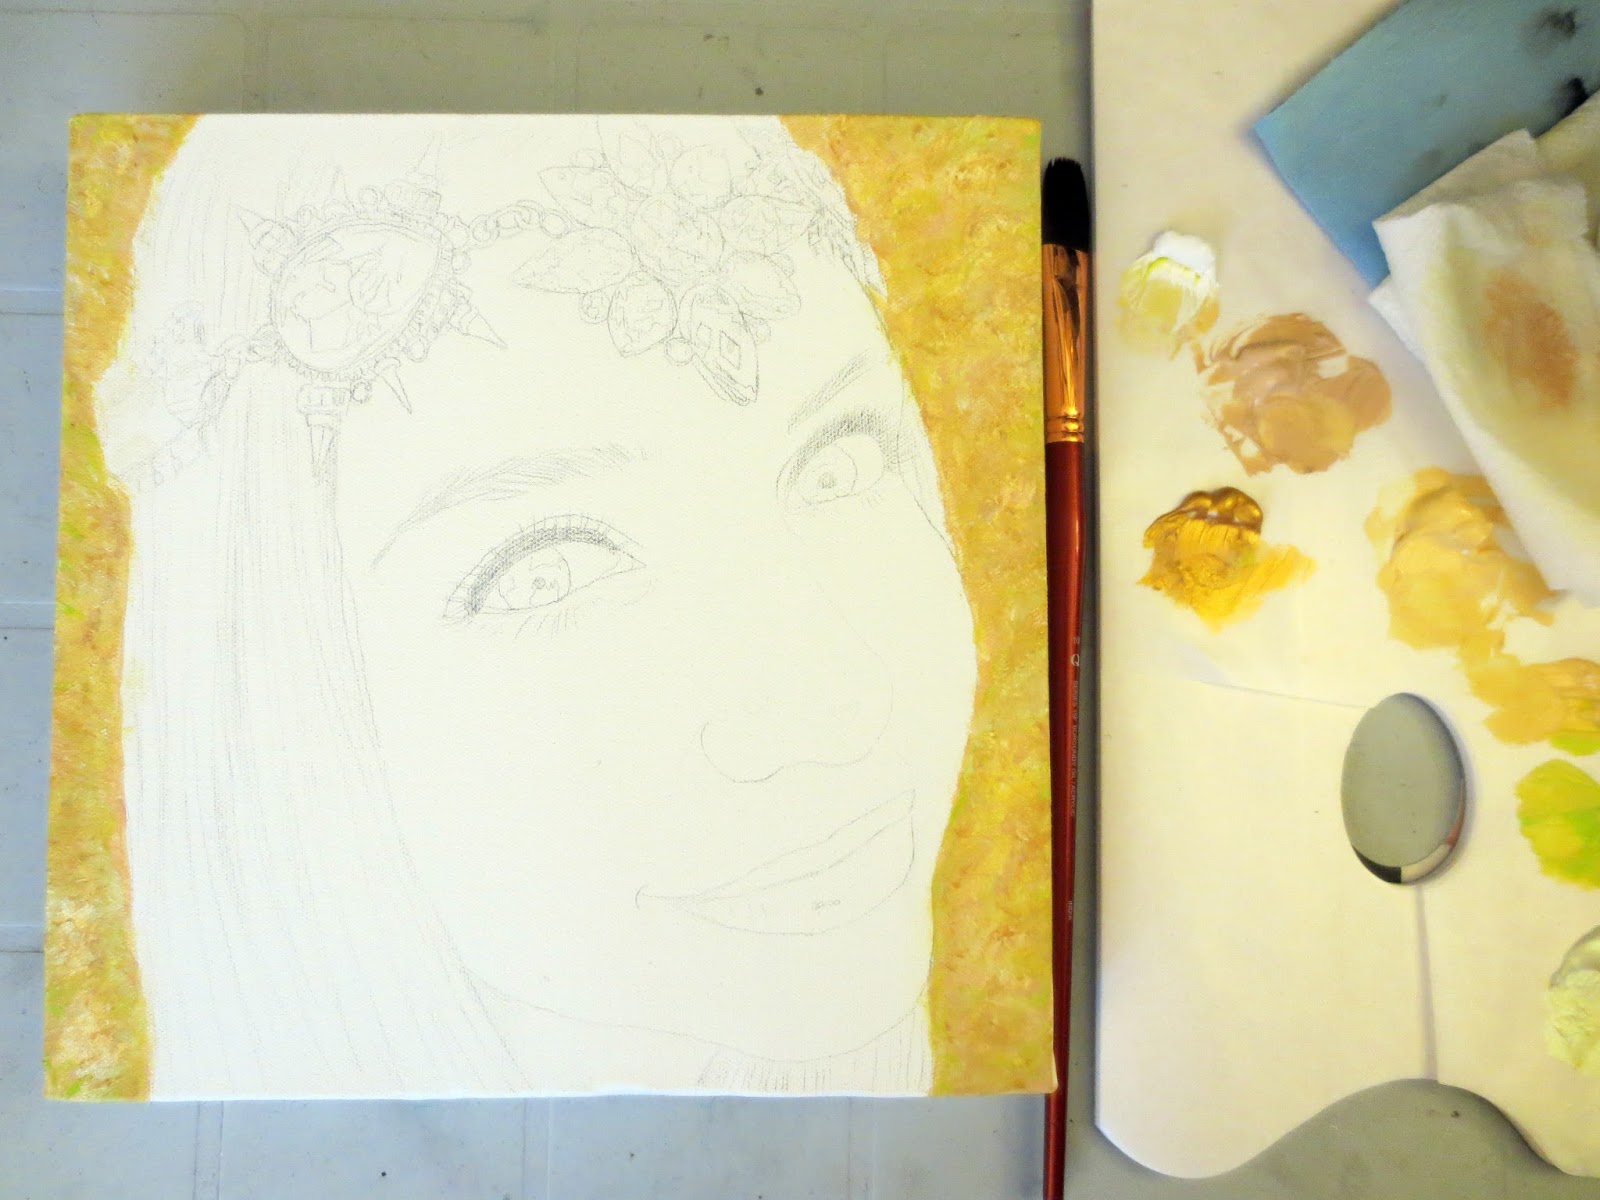
My next step is to paint in the background. It has always been my natural inclination to paint in whatever is furthest away first, working my way to the items that are closer and more detailed. I find this ensures that items in the foreground overlap those in the background, as they should. Many artists underestimate how important the order of their layers is to achieving realism and perspective.
Step 3: Layering The Flesh

For Oils: I LOVE oil paints! Especially when I'm trying to capture smooth well blended skin tones! When I'm using oils I will start with an initial layer that covers all flesh and determines where the lights and darks will go. You should try to capture the skin colour but know that this can be altered in the second layer. The shadows are most important in the first layer because they need to dry before they are built up in the next layer. Allow the first layer to dry completely. Then apply another layer deepening the shadows, brightening the lights, and getting more details with shimmer, beauty marks, etc. If necessary, allow this layer to dry completely before applying another layer. Do so until you are fully pleased.
For Acrylics: While I do enjoy working with acrylics, creating smooth well blended skin tones can be very challenging. How I go about achieving that look is something I am asked very often. Because acrylics dry very fast, blending is difficult. I pre-mix large portions of ALL the skin tones I will require and I make sure I have a wide range of tones (both light and dark). Remember, it is always better to have made too much of a colour than too little when it comes to acrylics. Once you start this painting process there will be no time to stop and mix more. Once I have all of my paint colours prepared on multiple palettes (lights on one, darks on another) I like to plop a bit of retarder onto each colour blob. This will help lengthen the drying time. With everything set, get painting! Paint in the skin tones, blending as you go, starting from one end to the other, as quickly as you can. When you've covered all the flesh allow the layer to dry completely (VERY dry, the smallest amount of moister could be catastrophic). Then apply another layer, blending as you go, very quickly, from one side to the other. Once you've allowed this to dry you can apply another layer if you wish but I wouldn't do many more after that.
Step 4: First Layer on Hair and Colours

This step if pretty simple and sometimes a nice break after working on the flesh. I simply do a basic layer on the hair and other colours I see in the piece. I might do some minor shading or detailing but nothing too complicated. I also DO NOT touch the facial features until I'm ready to get detailed.
Step 5: Eyes

No matter what medium I work in I always do my eyes in the same way. I start with shading and minor detailing around the eye, brow bone, and the lid. Then I move onto the eyebrow by first filling in the shape of the eyebrow with an all over colour (the one most seen in the reference). Then I go back in doing strands with flesh tones and lighter brow colour tones. Then I go back in with some darker brown strands and even some black depending on the person. Within your eyebrows you should see a little range of lights to darks. My next step is to fill in the eye whites using an all over off-white colour (the colour most seen in the reference) and then adding in some shadows in grey, brown, pink, and peach. Sometimes, because of reflections, there are blue shadows in the eyes. Once I am pleased with the look of the eye whites I move onto the irises starting first with an all over colour (the mid tone of the eyes) and then adding in light details and dark details. In my experience I have found that there is a darker ring around the iris which gives the eye more definition and life. Once all the details are in place I fill in the pupil and then the white eye shine. Eyes generally always have a little shine in each eye. This also gives them life. But keep in mind the shines can be different from each other. One may be bigger than the other or even shaped differently. Make sure to capture what you see in the reference. At this point I prefer to allow my eyes to dry if time permits. The next step would be to define the lines around the eye using a variety of colours and shades. Notice where there are shines and shadows and include black eyeliner if it's present in the reference. When all looks good, apply the lashes using a very small long bristled soft brush.
Step 6: Nose and Lips

The nose is generally an easy task achieved using first lights and darks to add shines and shadows. Then apply faint lines where necessary to give the nose definition. The lips are achieved using far more steps. First I go around the lips applying shines and shadows where I see them in the reference. Then I apply my dark middle line that separates the lips. I like to put this line in first to help me maintain the shape of the lips when I apply the all-over colour (the colour most seen on the lips in the reference). Then layers of darker colours are placed on the lips to show detail and shadow. Once the darker shades are in place, lighter shades are applied to give the lips more dimension. Finally the lip shines can be placed on, usually on the bottom lip, but sometimes the light reaches the top lip as well.
Step 7: Hair

The hair step is by far the most tedious for me. Using a variety of shades and colours, create strands throughout the hair. While some artists opt for sections of light and dark in order to save time, I can't help but put in the tiny little strands. I think the results are far more impressive in the end.
Step 8: The Final Details

In the final layer I go through all of the jewelry or areas of clothing and add the appropriate shading and details. Though this stage is the final one it can often be one of the most time consuming and can make you're piece extremely impressive. Once the facial features are in it sometimes feels like the portrait is complete, making the final details seem a little tedious. But if I know that will be the case I will save the facial features last to keep my anticipation high. Once the final lines go in the piece will look polished and alive!
I hope you enjoyed this Art Tutorial! Feel free to leave any questions or comments below or direct them to me on ...
Facebook: www.Facebook.com/MalindaPrudhomme
Twitter: www.Twitter.com/MalindaArt
Instagram: www.Instagram.com/MalindaPrudhomme
Website: www.MalindaPrudhomme.com
No comments:
Post a Comment